Assembly instructions
We had the small trolley assembled by young people in the congregation. They told us that it was easy to assemble. We recommend in every way the presence of parents if this is assembled by children.
You can download assembly instructions here:
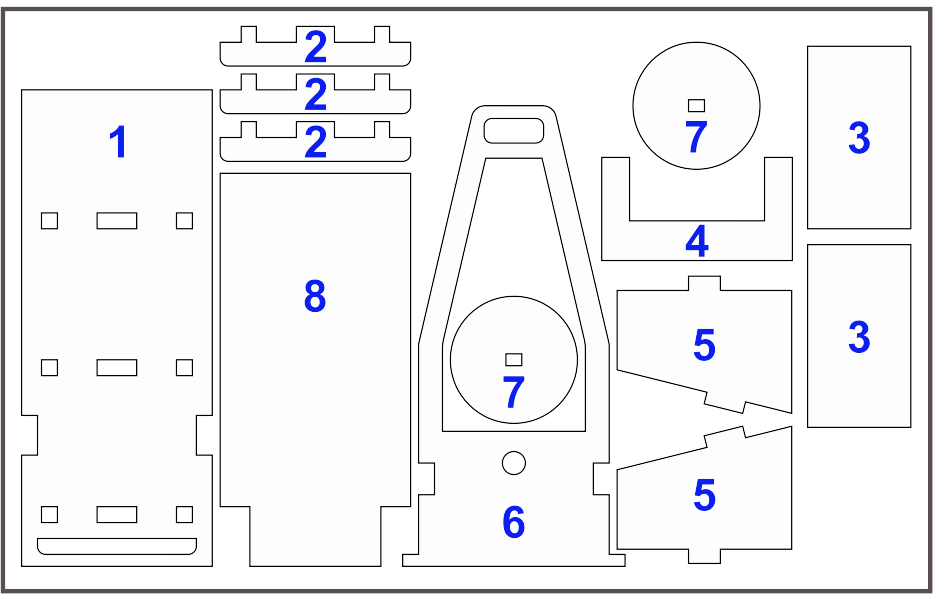
Prepare the pieces
Peel off the pieces gently. The pieces are shown in the gifura opposite. Put them in number order, as that is the order they are needed for construction.
Note:
- →
 In red we indicate where to place the glue. LITTLE glue is needed.
 - →
 A box cutter or scissors may be used.
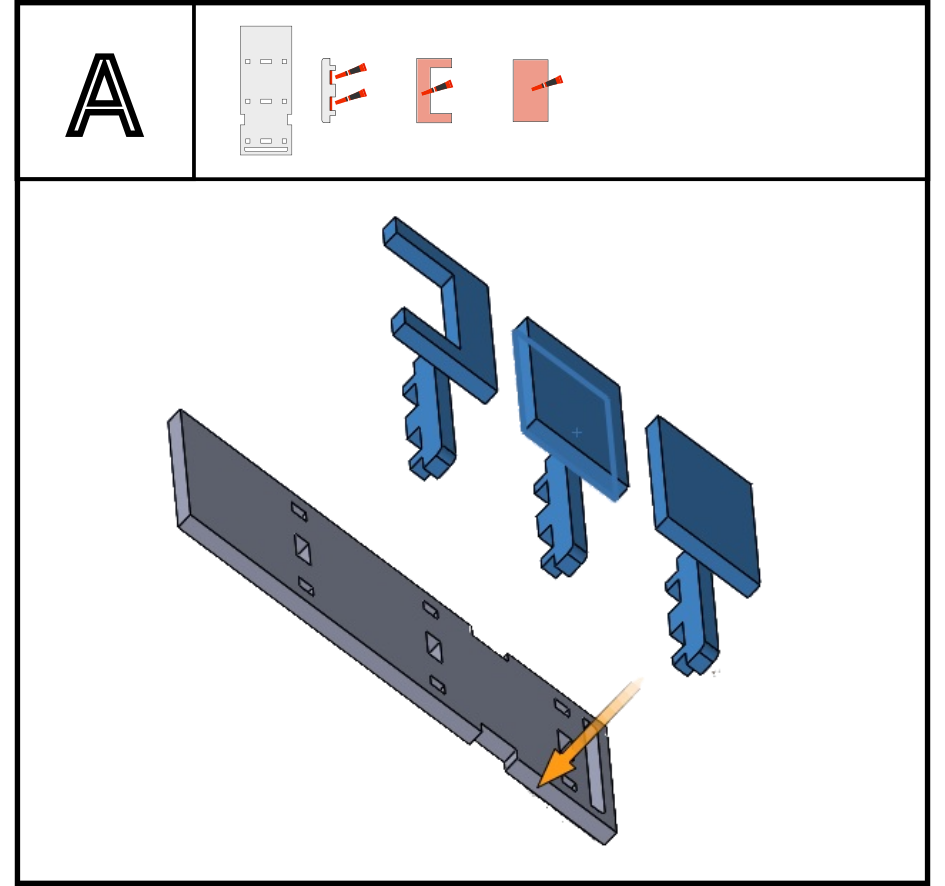
A - Prepare the panel
Used pieces: 1, 2, 3, 4 ;
Use a plane, and insert the 2 pieces gently. Use a little glue so that they are permanently attached. Then lay the pieces 3 and 4 as in the picture.
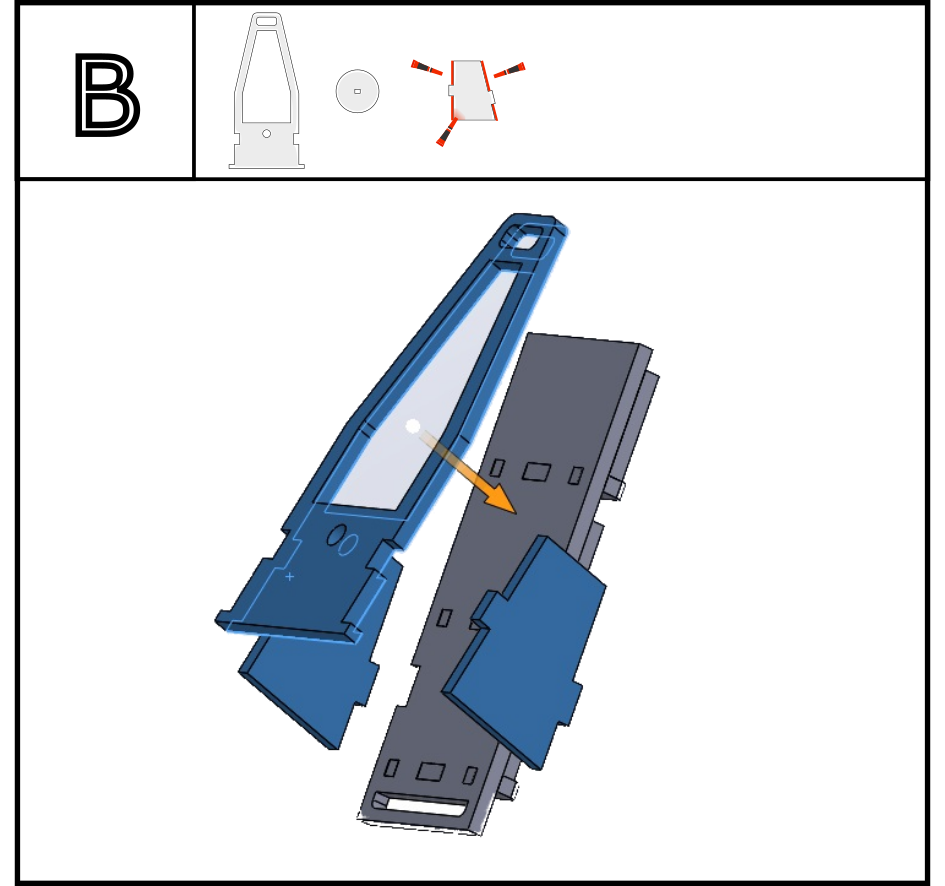
B - Complete the structure
Used pieces: 5, 6 ;
This is the hardest part and if you are not careful you risk finding your fingers full of glue. Therefore, I repeat, use LESS glue and be patient. Attach the pieces as shown, and hold them in that position until the glue is completely dry. Just be careful, that pieces 5 and 6 have a direction. We wouldn't want any writing to be then inward....
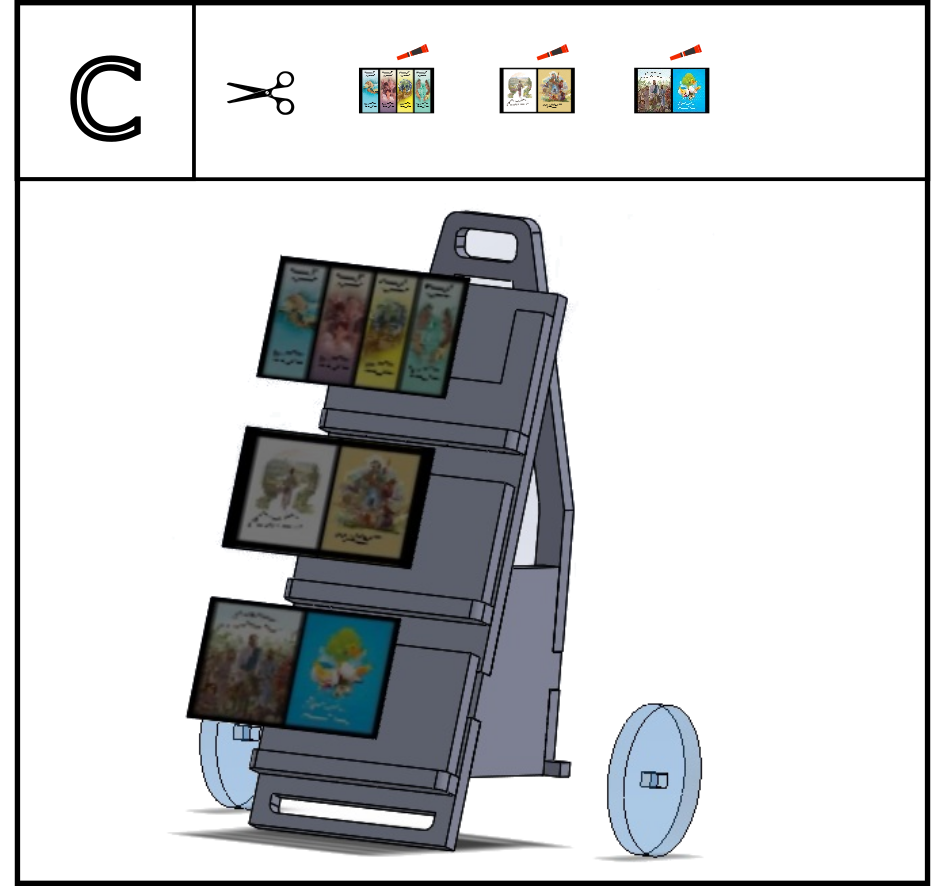
C - Paste publications
Used pieces: 7 ;
Paste publications
After that, from the cardboard, cut out the publications. Then glue them into your small display.
If you make a mistake, you can reprint the labels; we recommend using a paper of at least 200gr/m2::
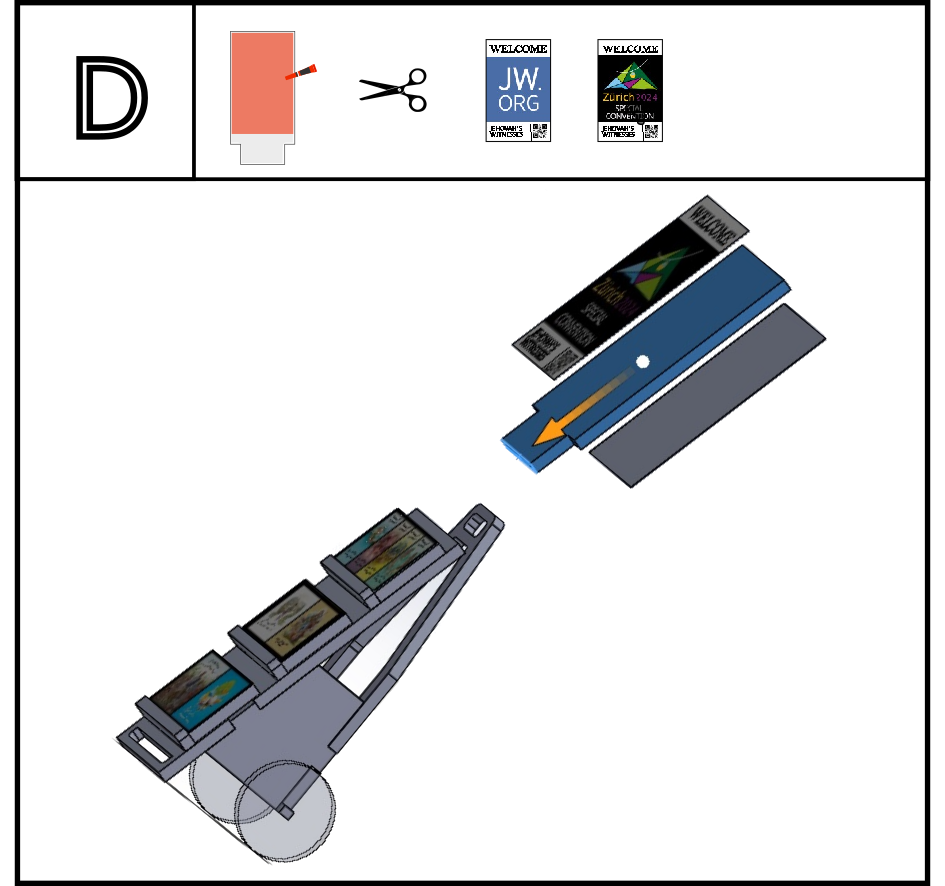
D - Prepare the panel
Used pieces: 8 ;
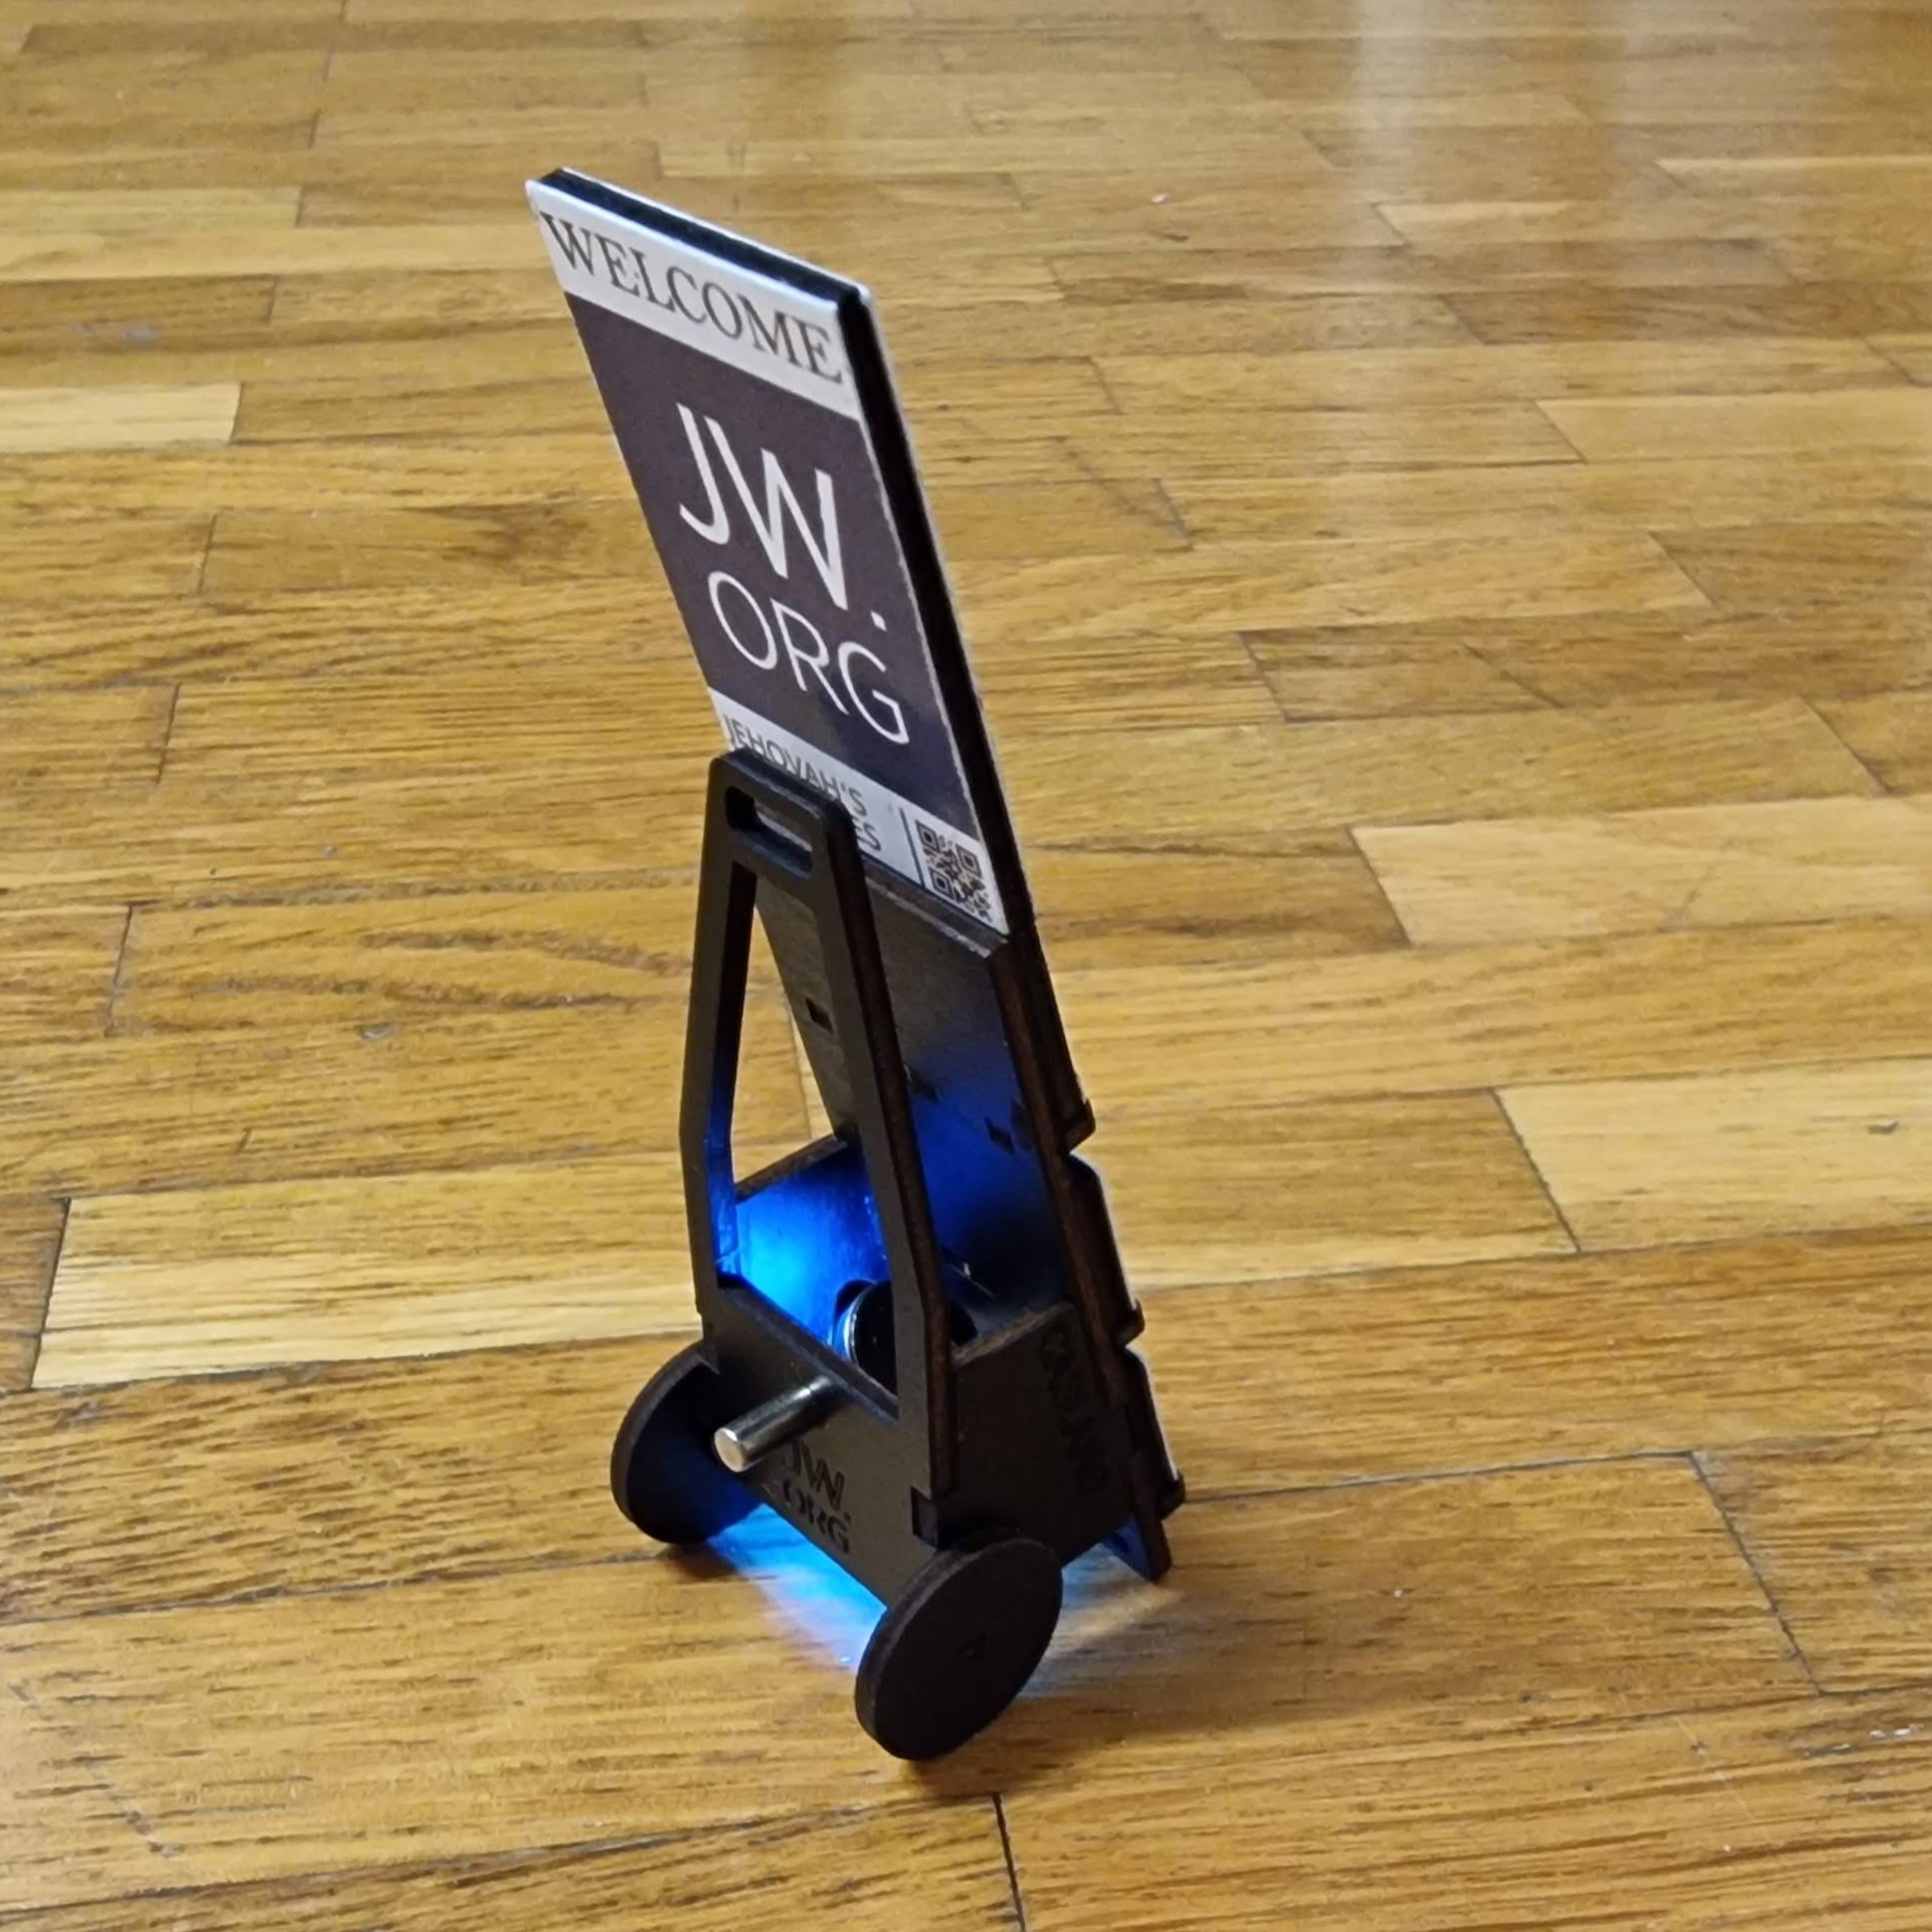
Now you are ready to place the panel. Before placing it in place, glue the remaining pieces of cardboard to it. These need to be lined up on the side. Once the glue has dried, you have completed your mini trolley! Congratulations. Now, if you want, you are ready to write and send us a picture.

Variants
Some variations for this small display, is to insert a cylindrical magnet (diameter Ø3mm, at least 8mm long) to fit in the back hole. This way you can stick the display in the refrigerator.... Another variously is to put small battery-operated lights.